
If you want to reduce your protected data footprint, whether to align with your subscription limits or simply refine what’s backed up, the cleanest approach is to delete your existing backup job and repository, then create a new, targeted setup.
Delete the Existing Backup Job
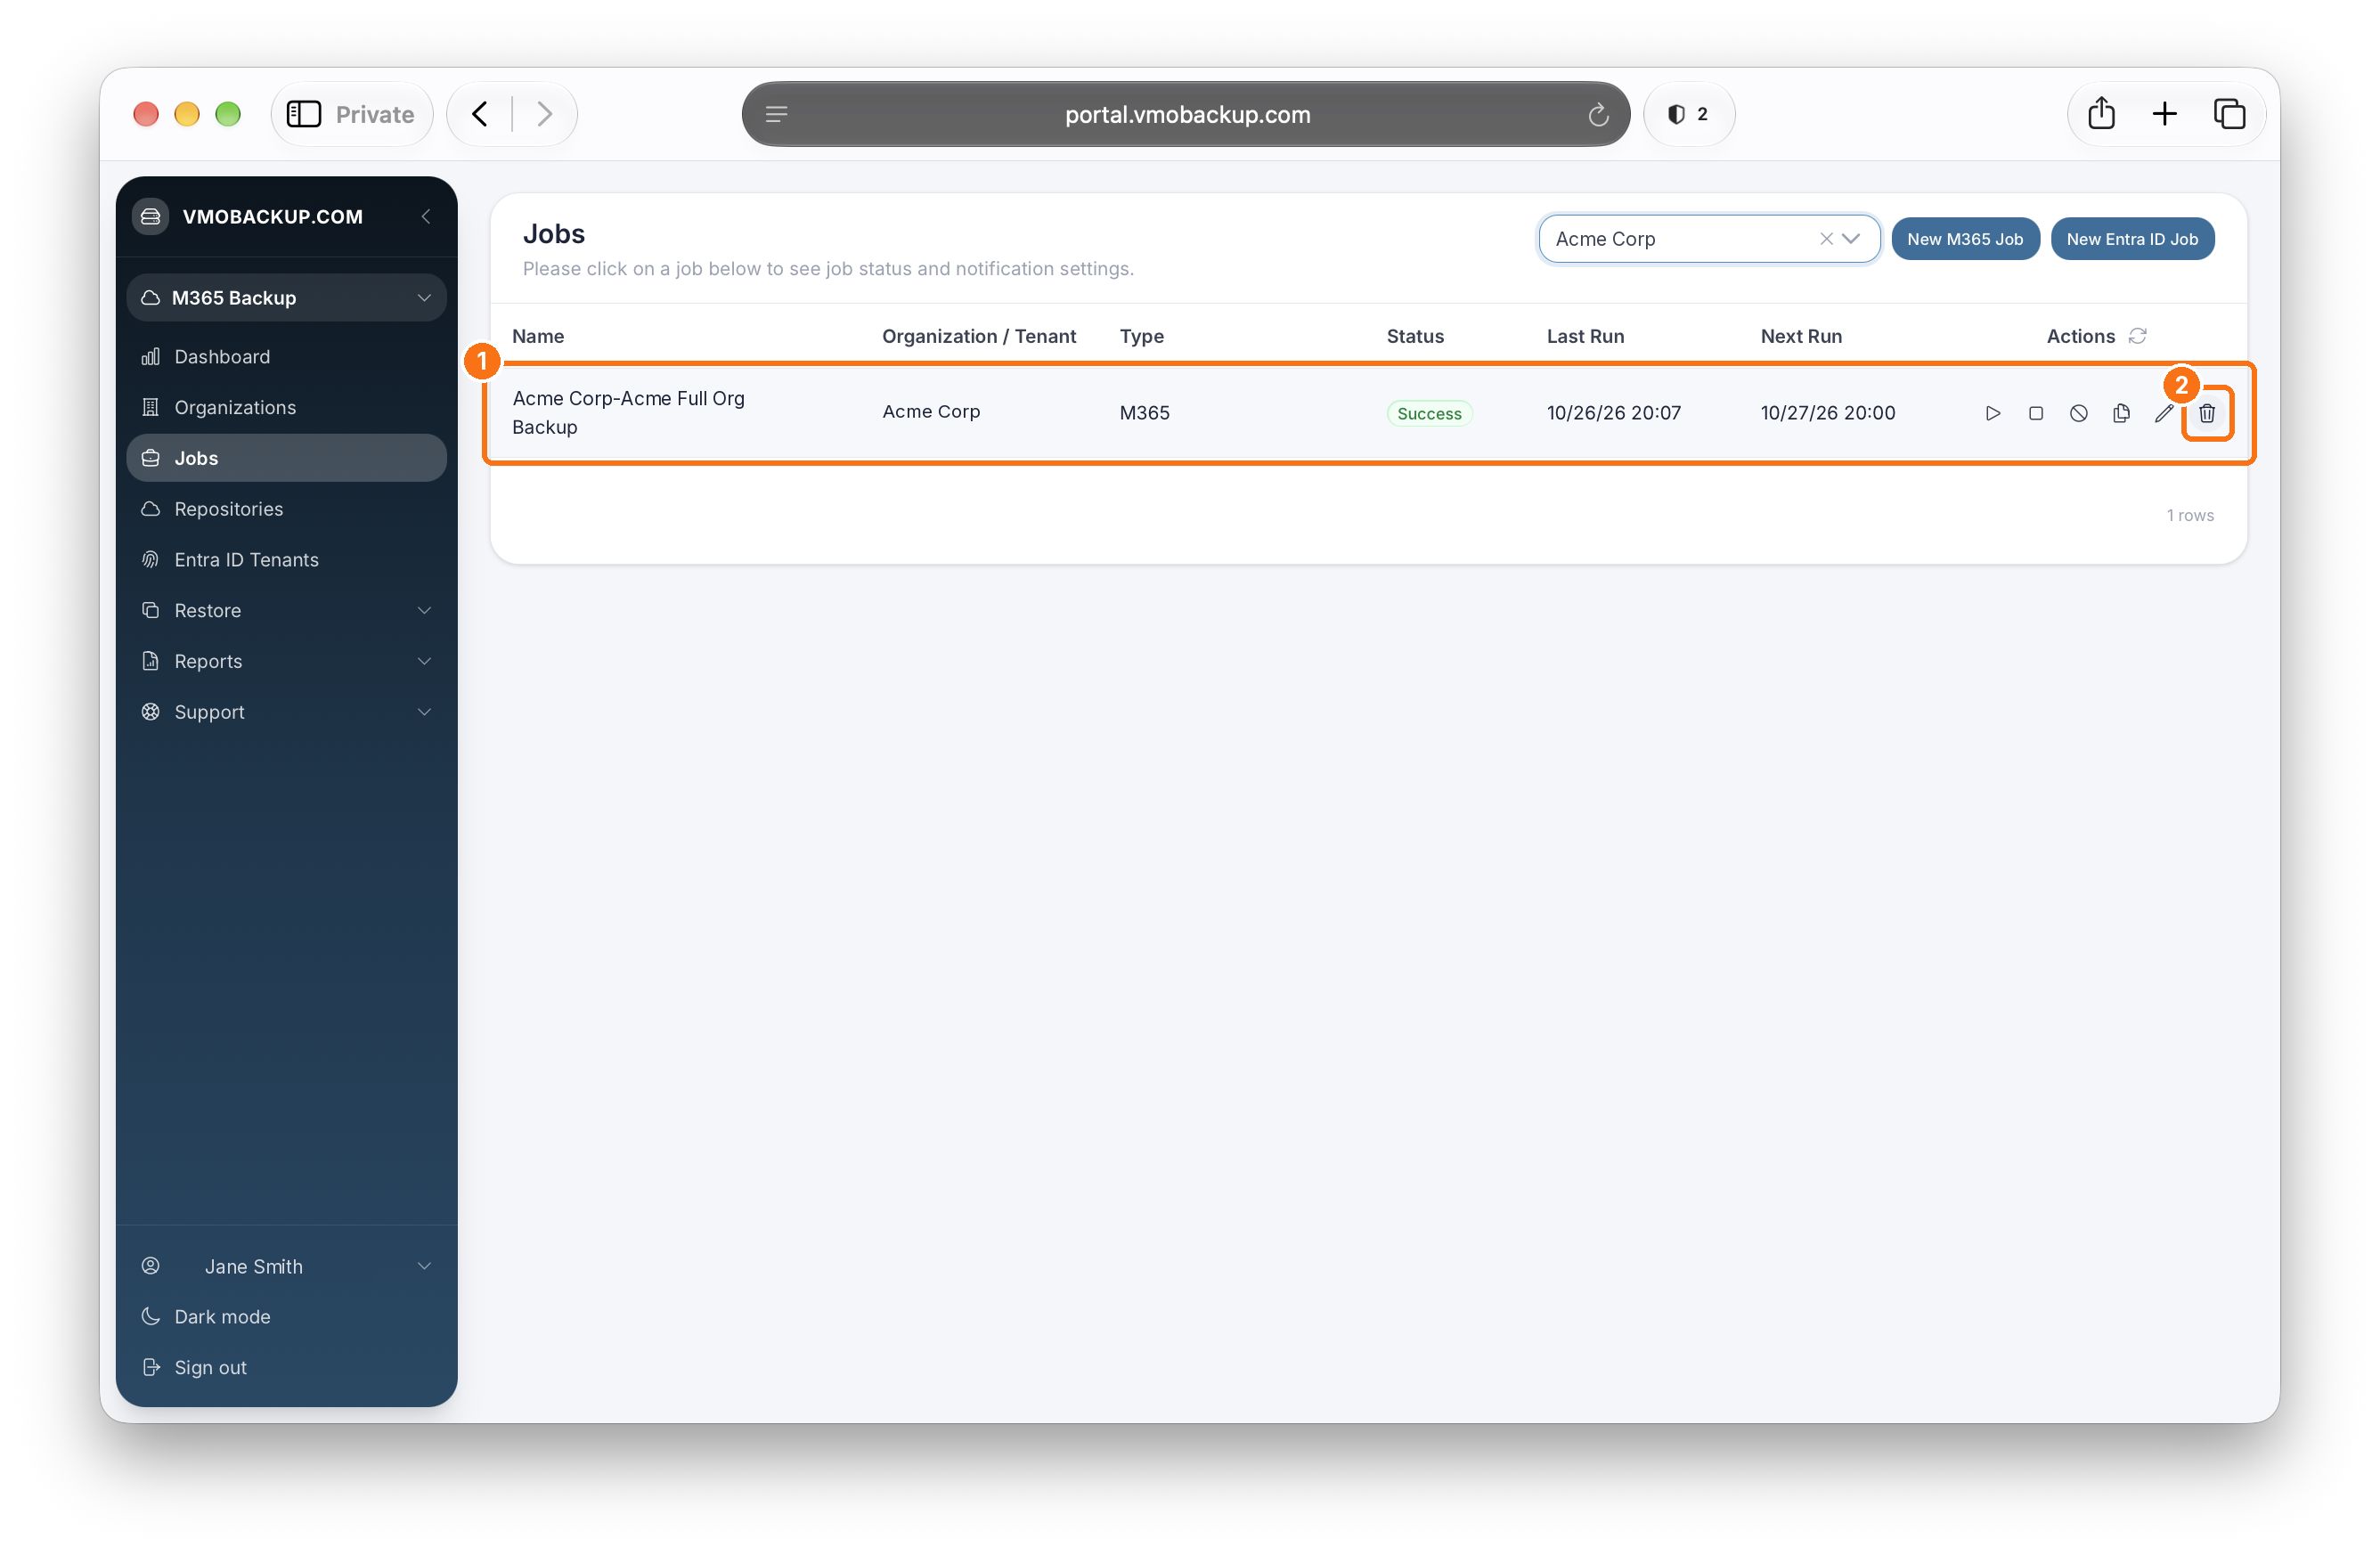
From the left-hand navigation, click Jobs. Locate the backup job you want to remove, then click the trash icon under Actions. Confirm the deletion when prompted.
Delete the Existing Repository
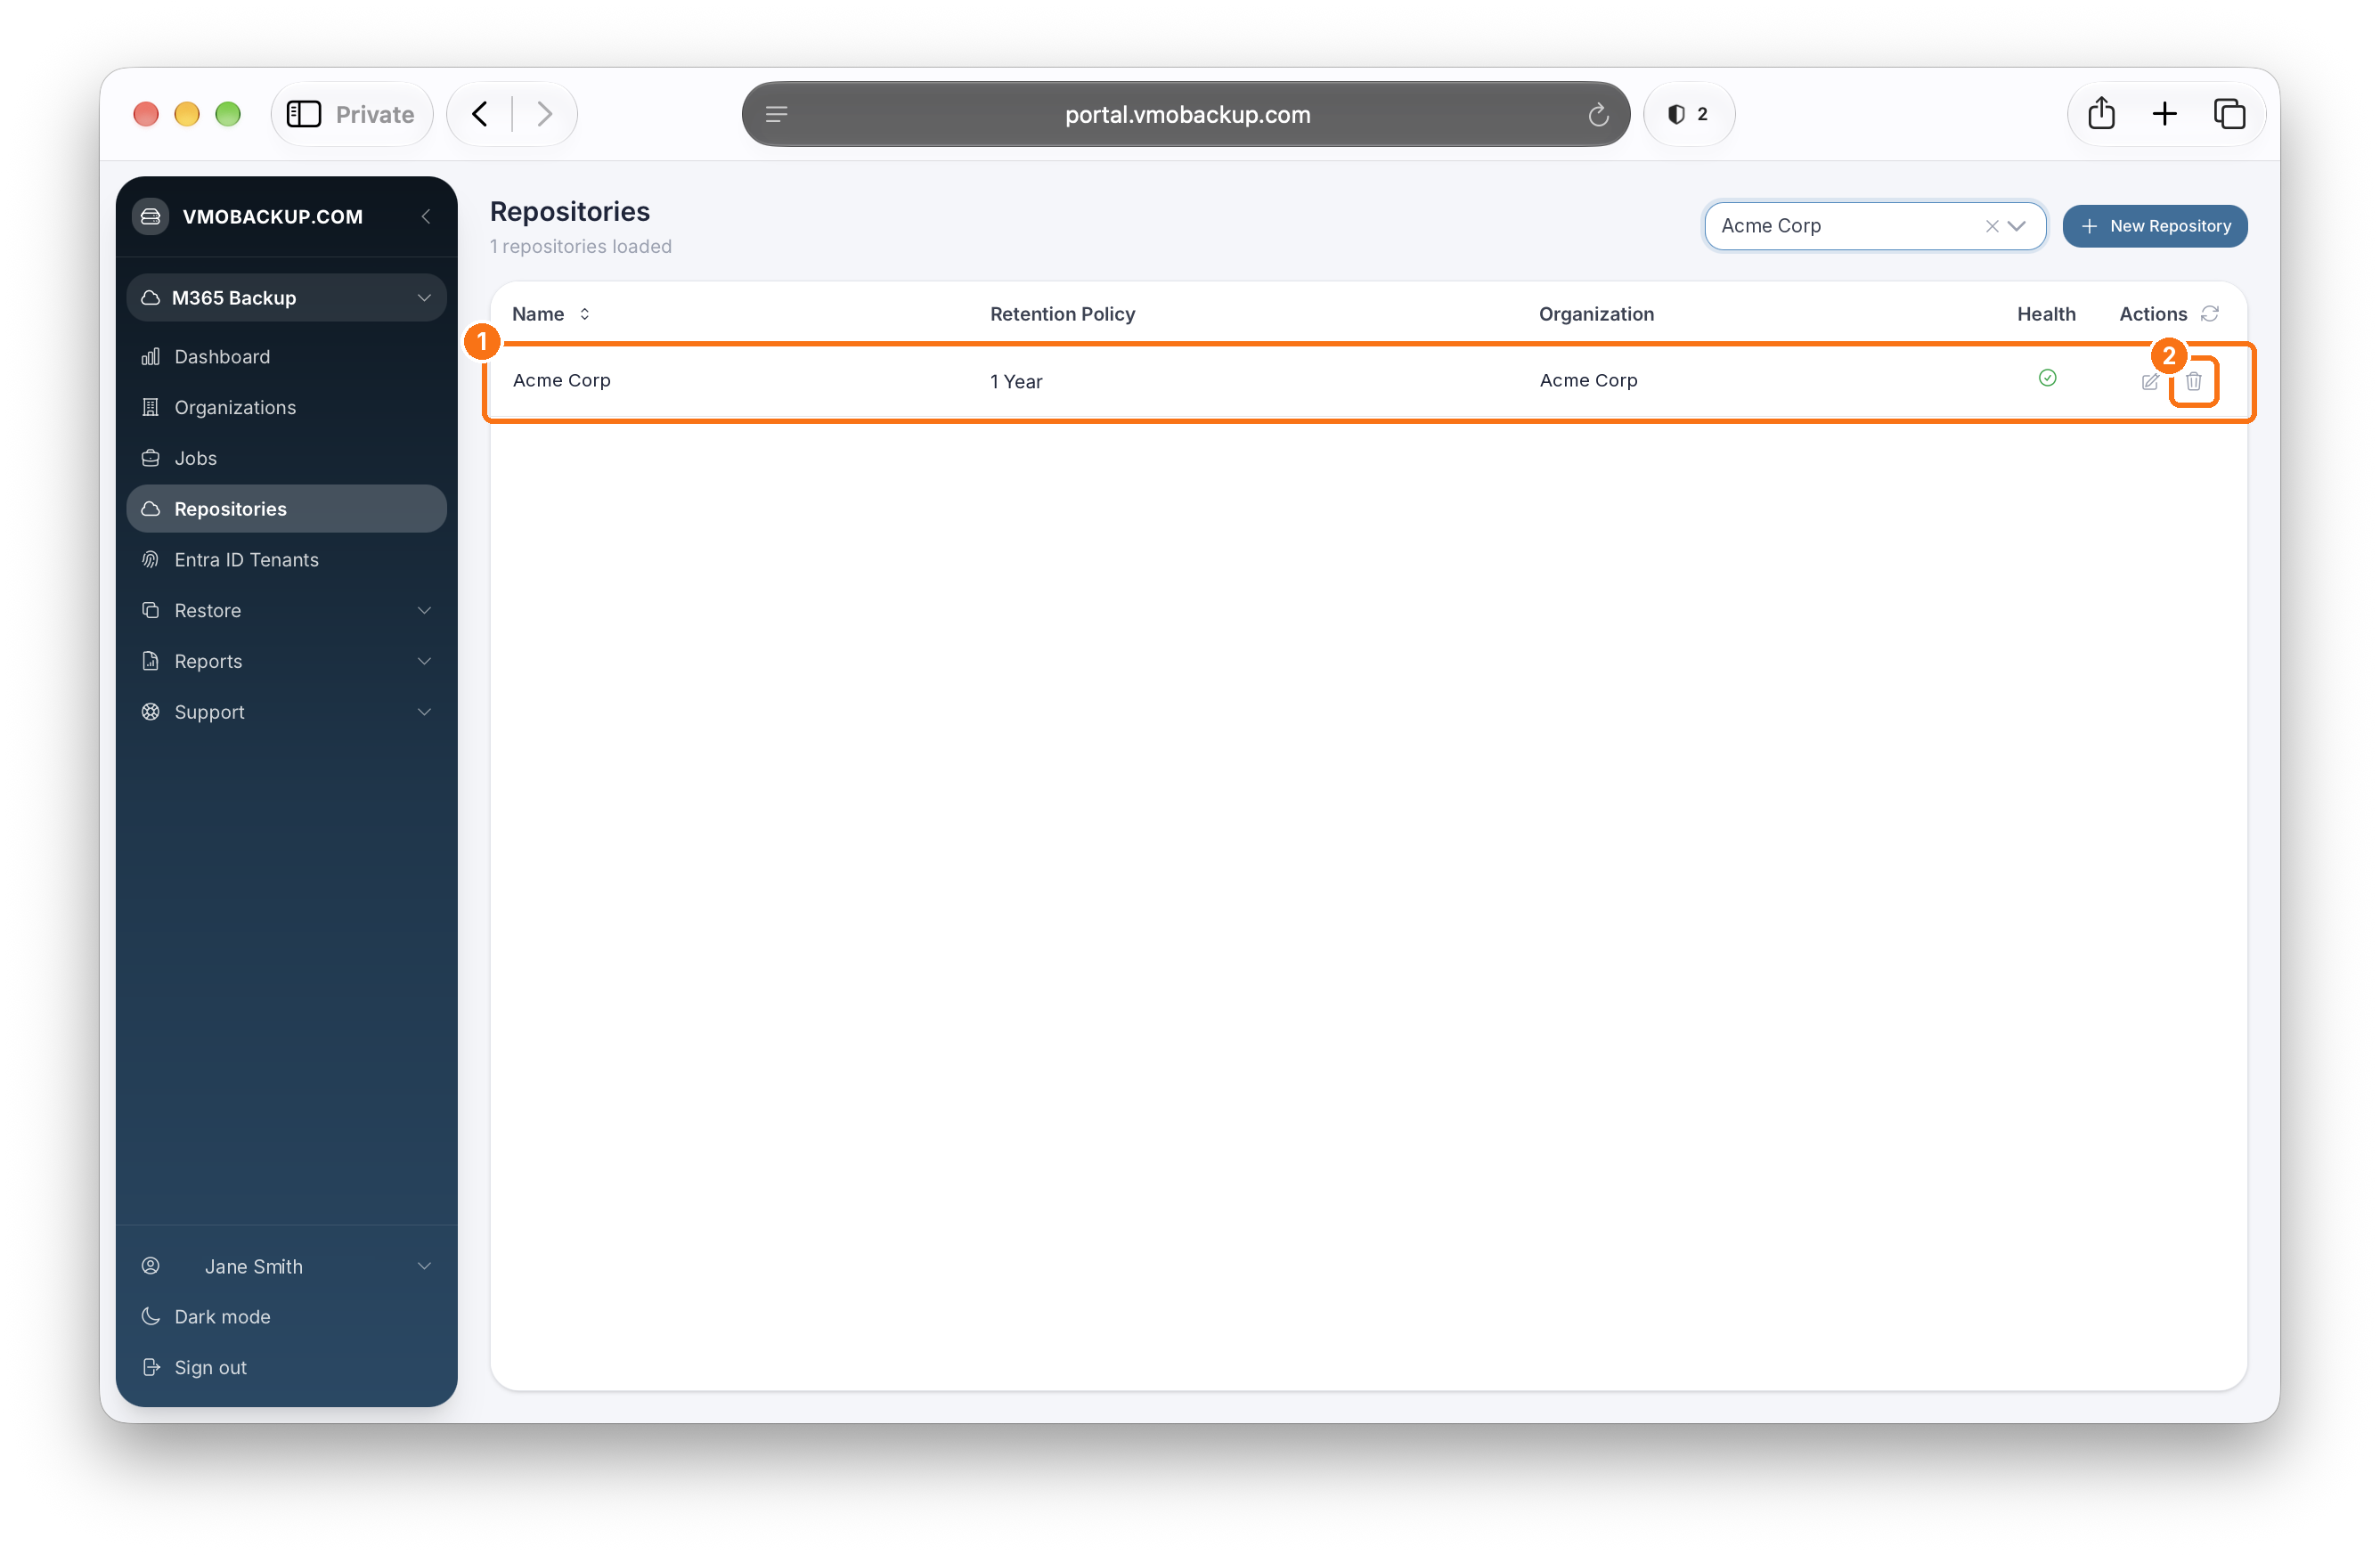
From the left-hand navigation, click Repositories. Find the repository tied to the backup job you just deleted, then click the trash icon under Actions. Confirm the deletion when prompted.
Important: Deleting a repository permanently removes the backup data stored in it. Make sure you no longer need this data before deleting.
Create a New Repository
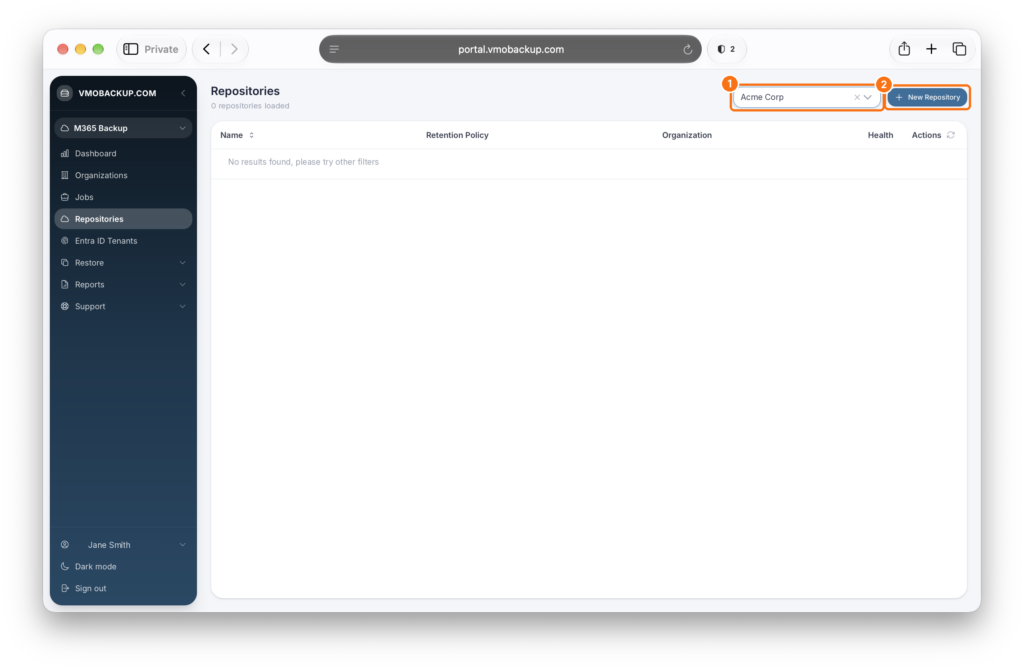
On the Repositories page, select your organization from the dropdown at the top of the page, then click New Repository.
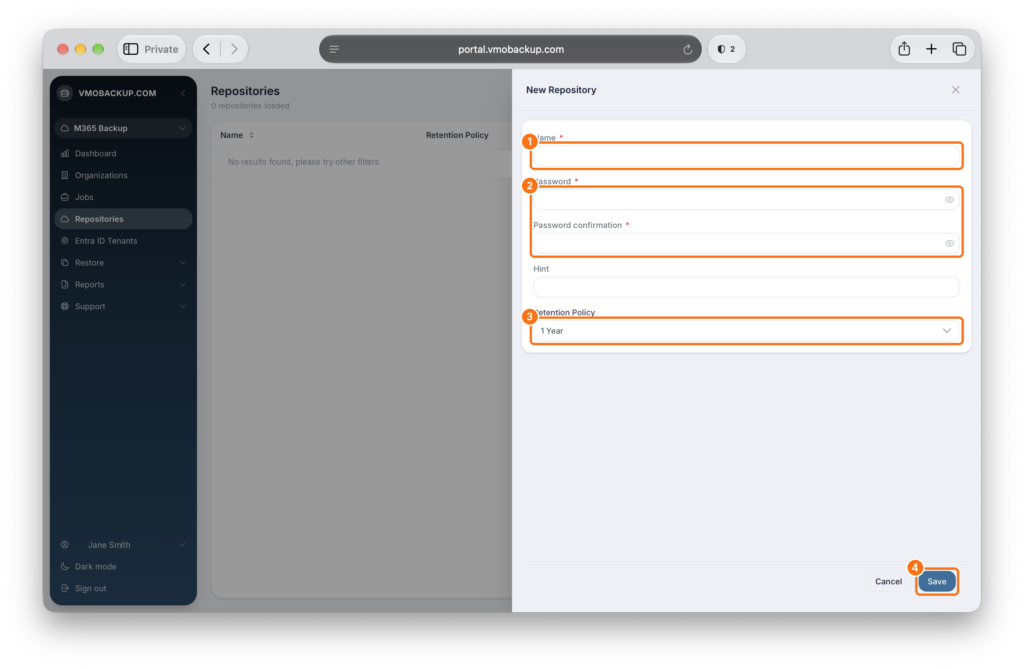
Enter a Name that reflects the new scope (for example, Priority Teams Only). Enter a Password and confirm it, add an optional Hint, and choose a Retention Policy. Click Save.
Tip: Keep a record of the repository password in a secure place.
Create a New Backup Job
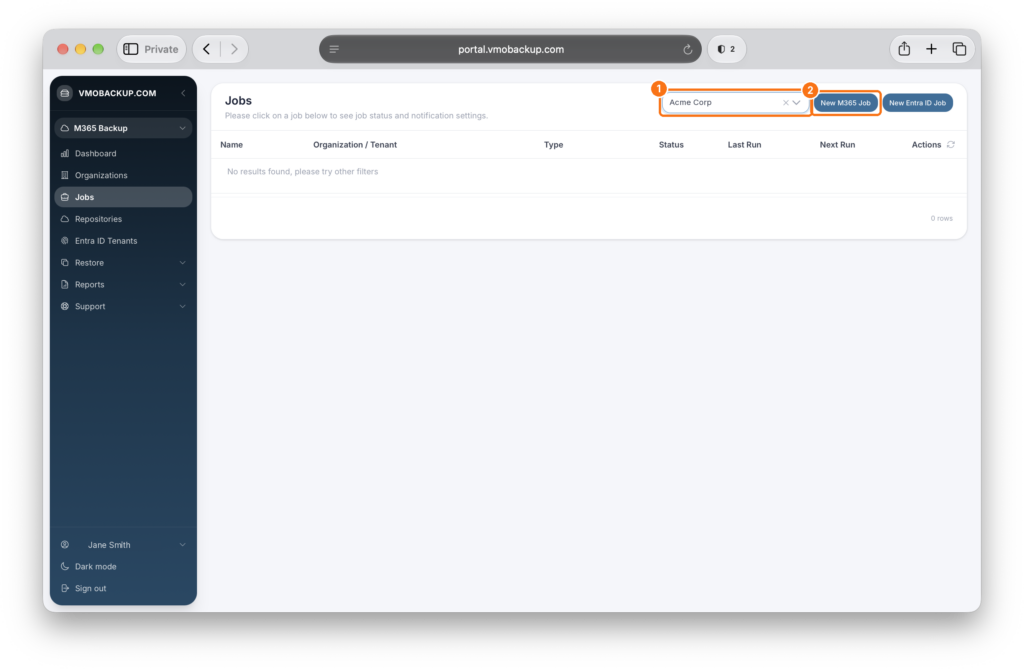
From the left-hand navigation, click Jobs. Select your organization from the dropdown, then click New M365 Job.
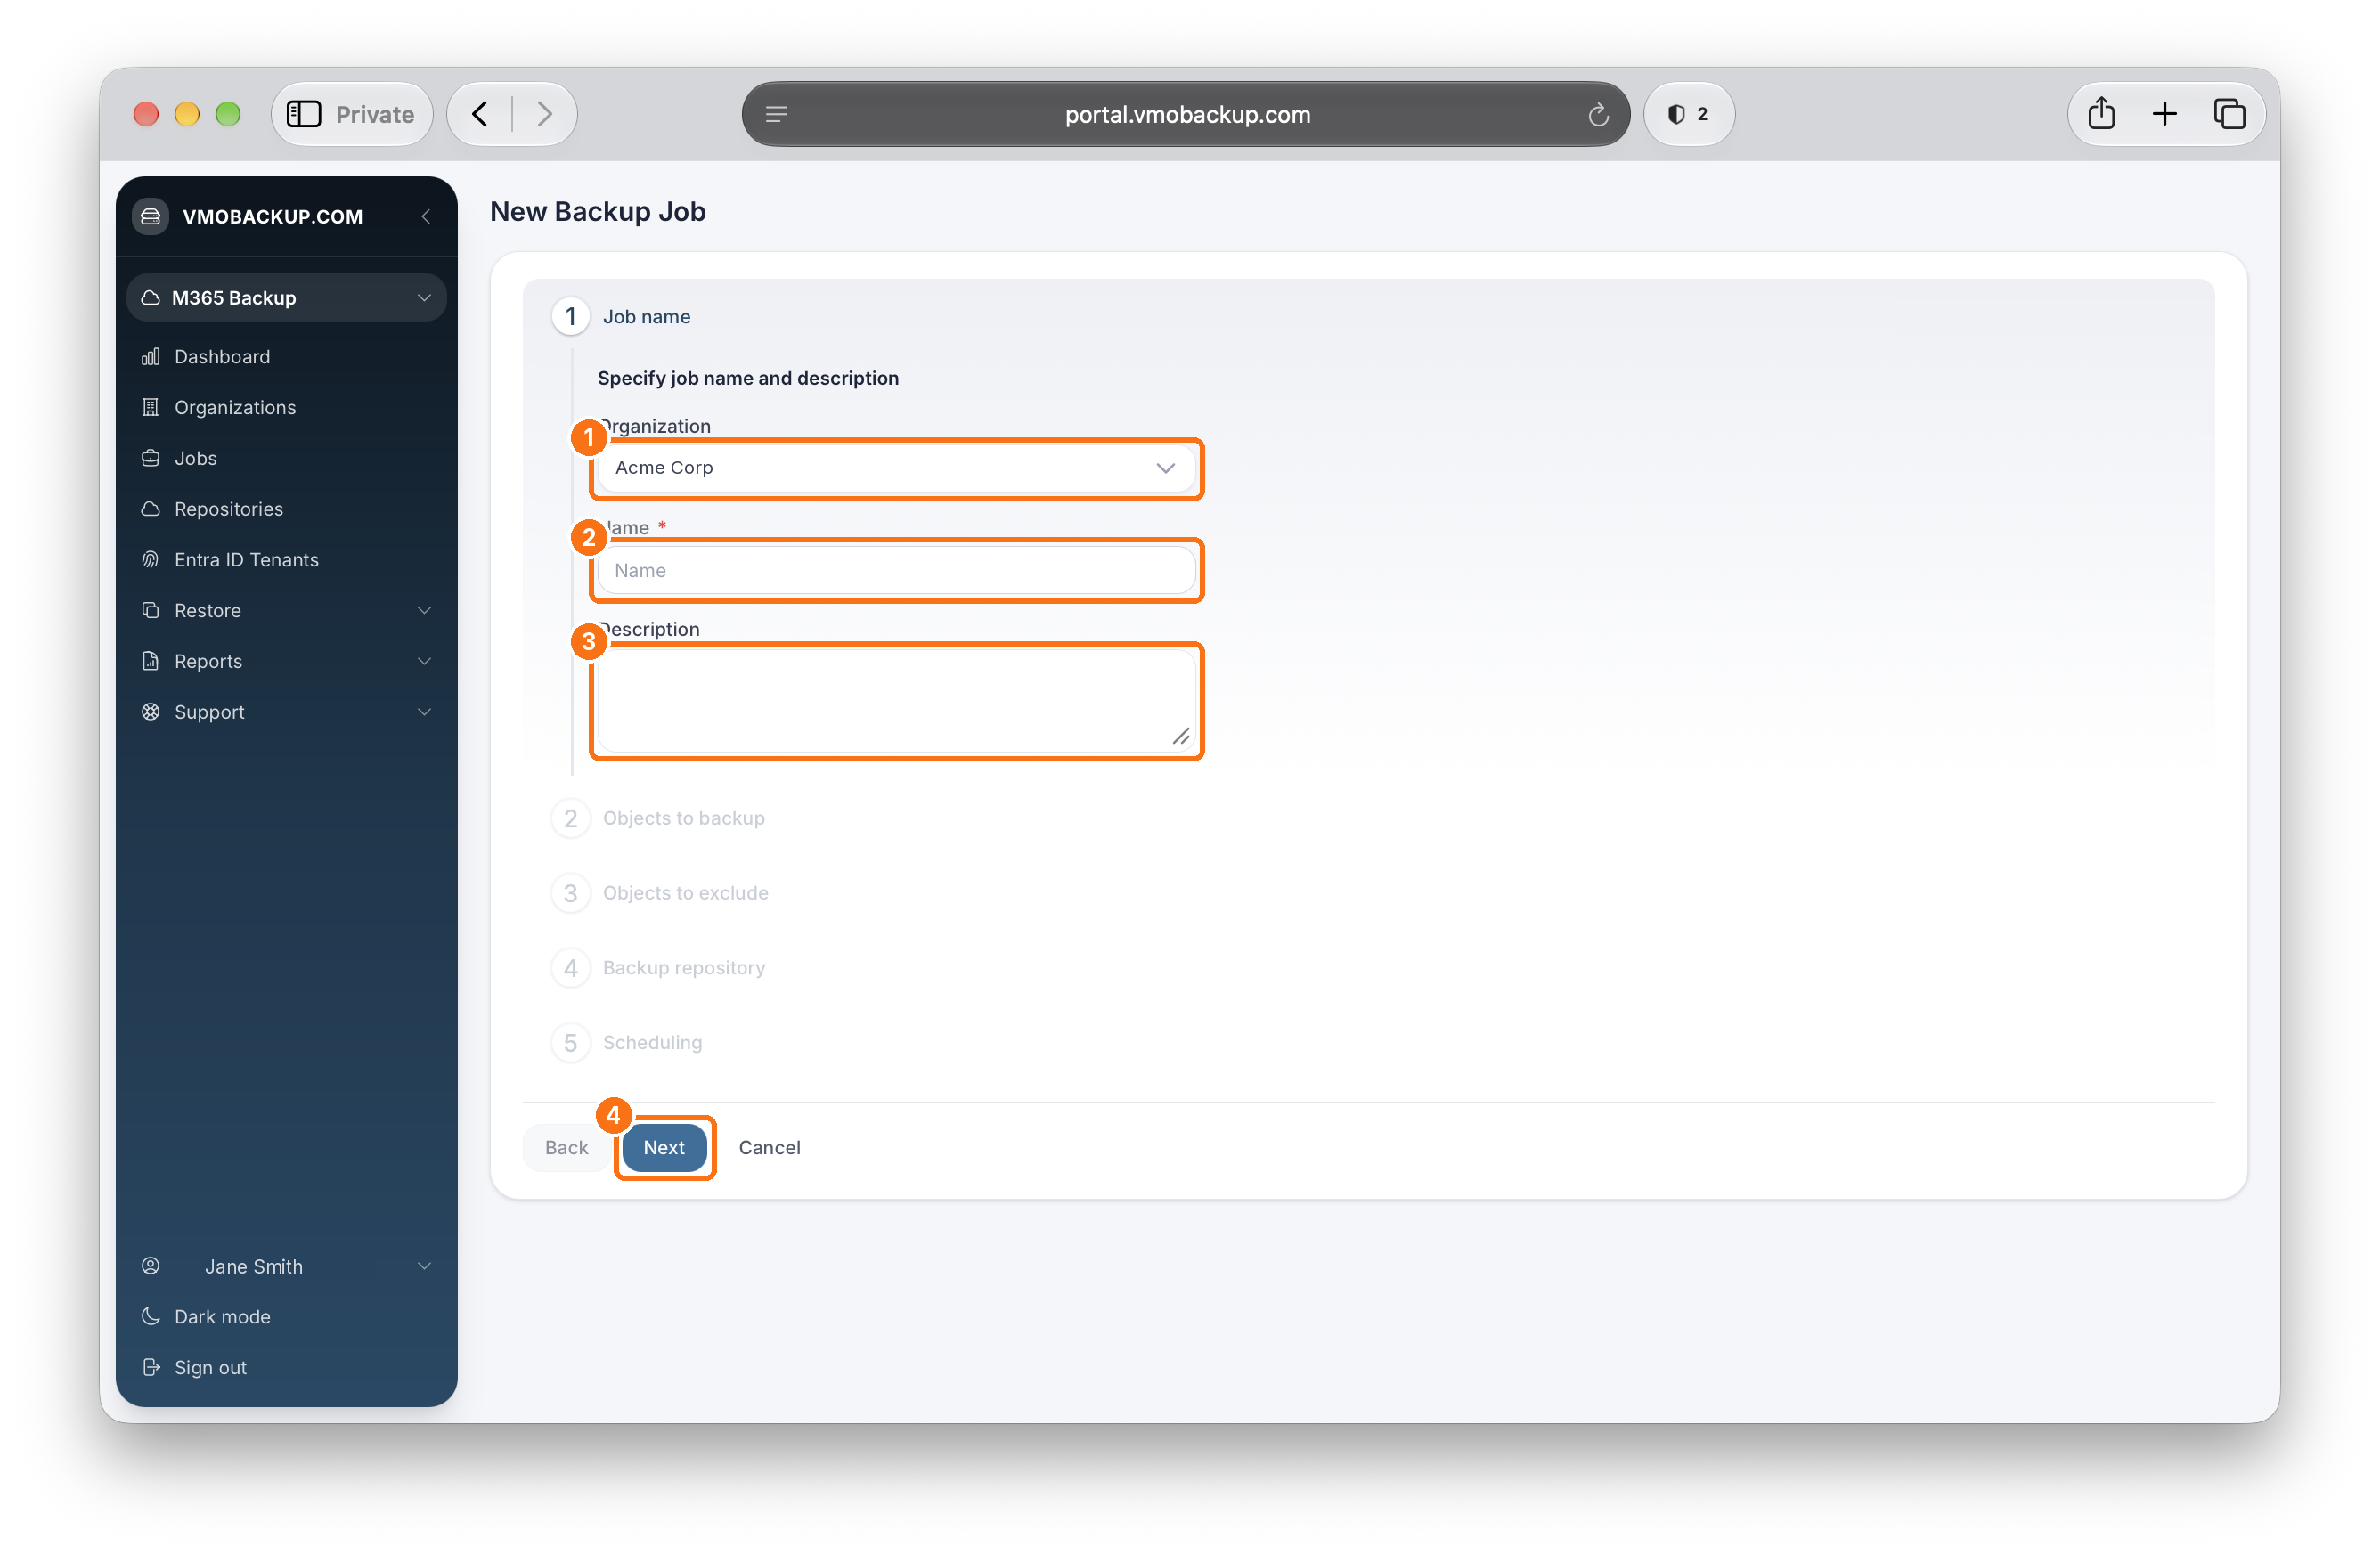
Confirm the Organization, enter a Name and optional Description for the job, then click Next.
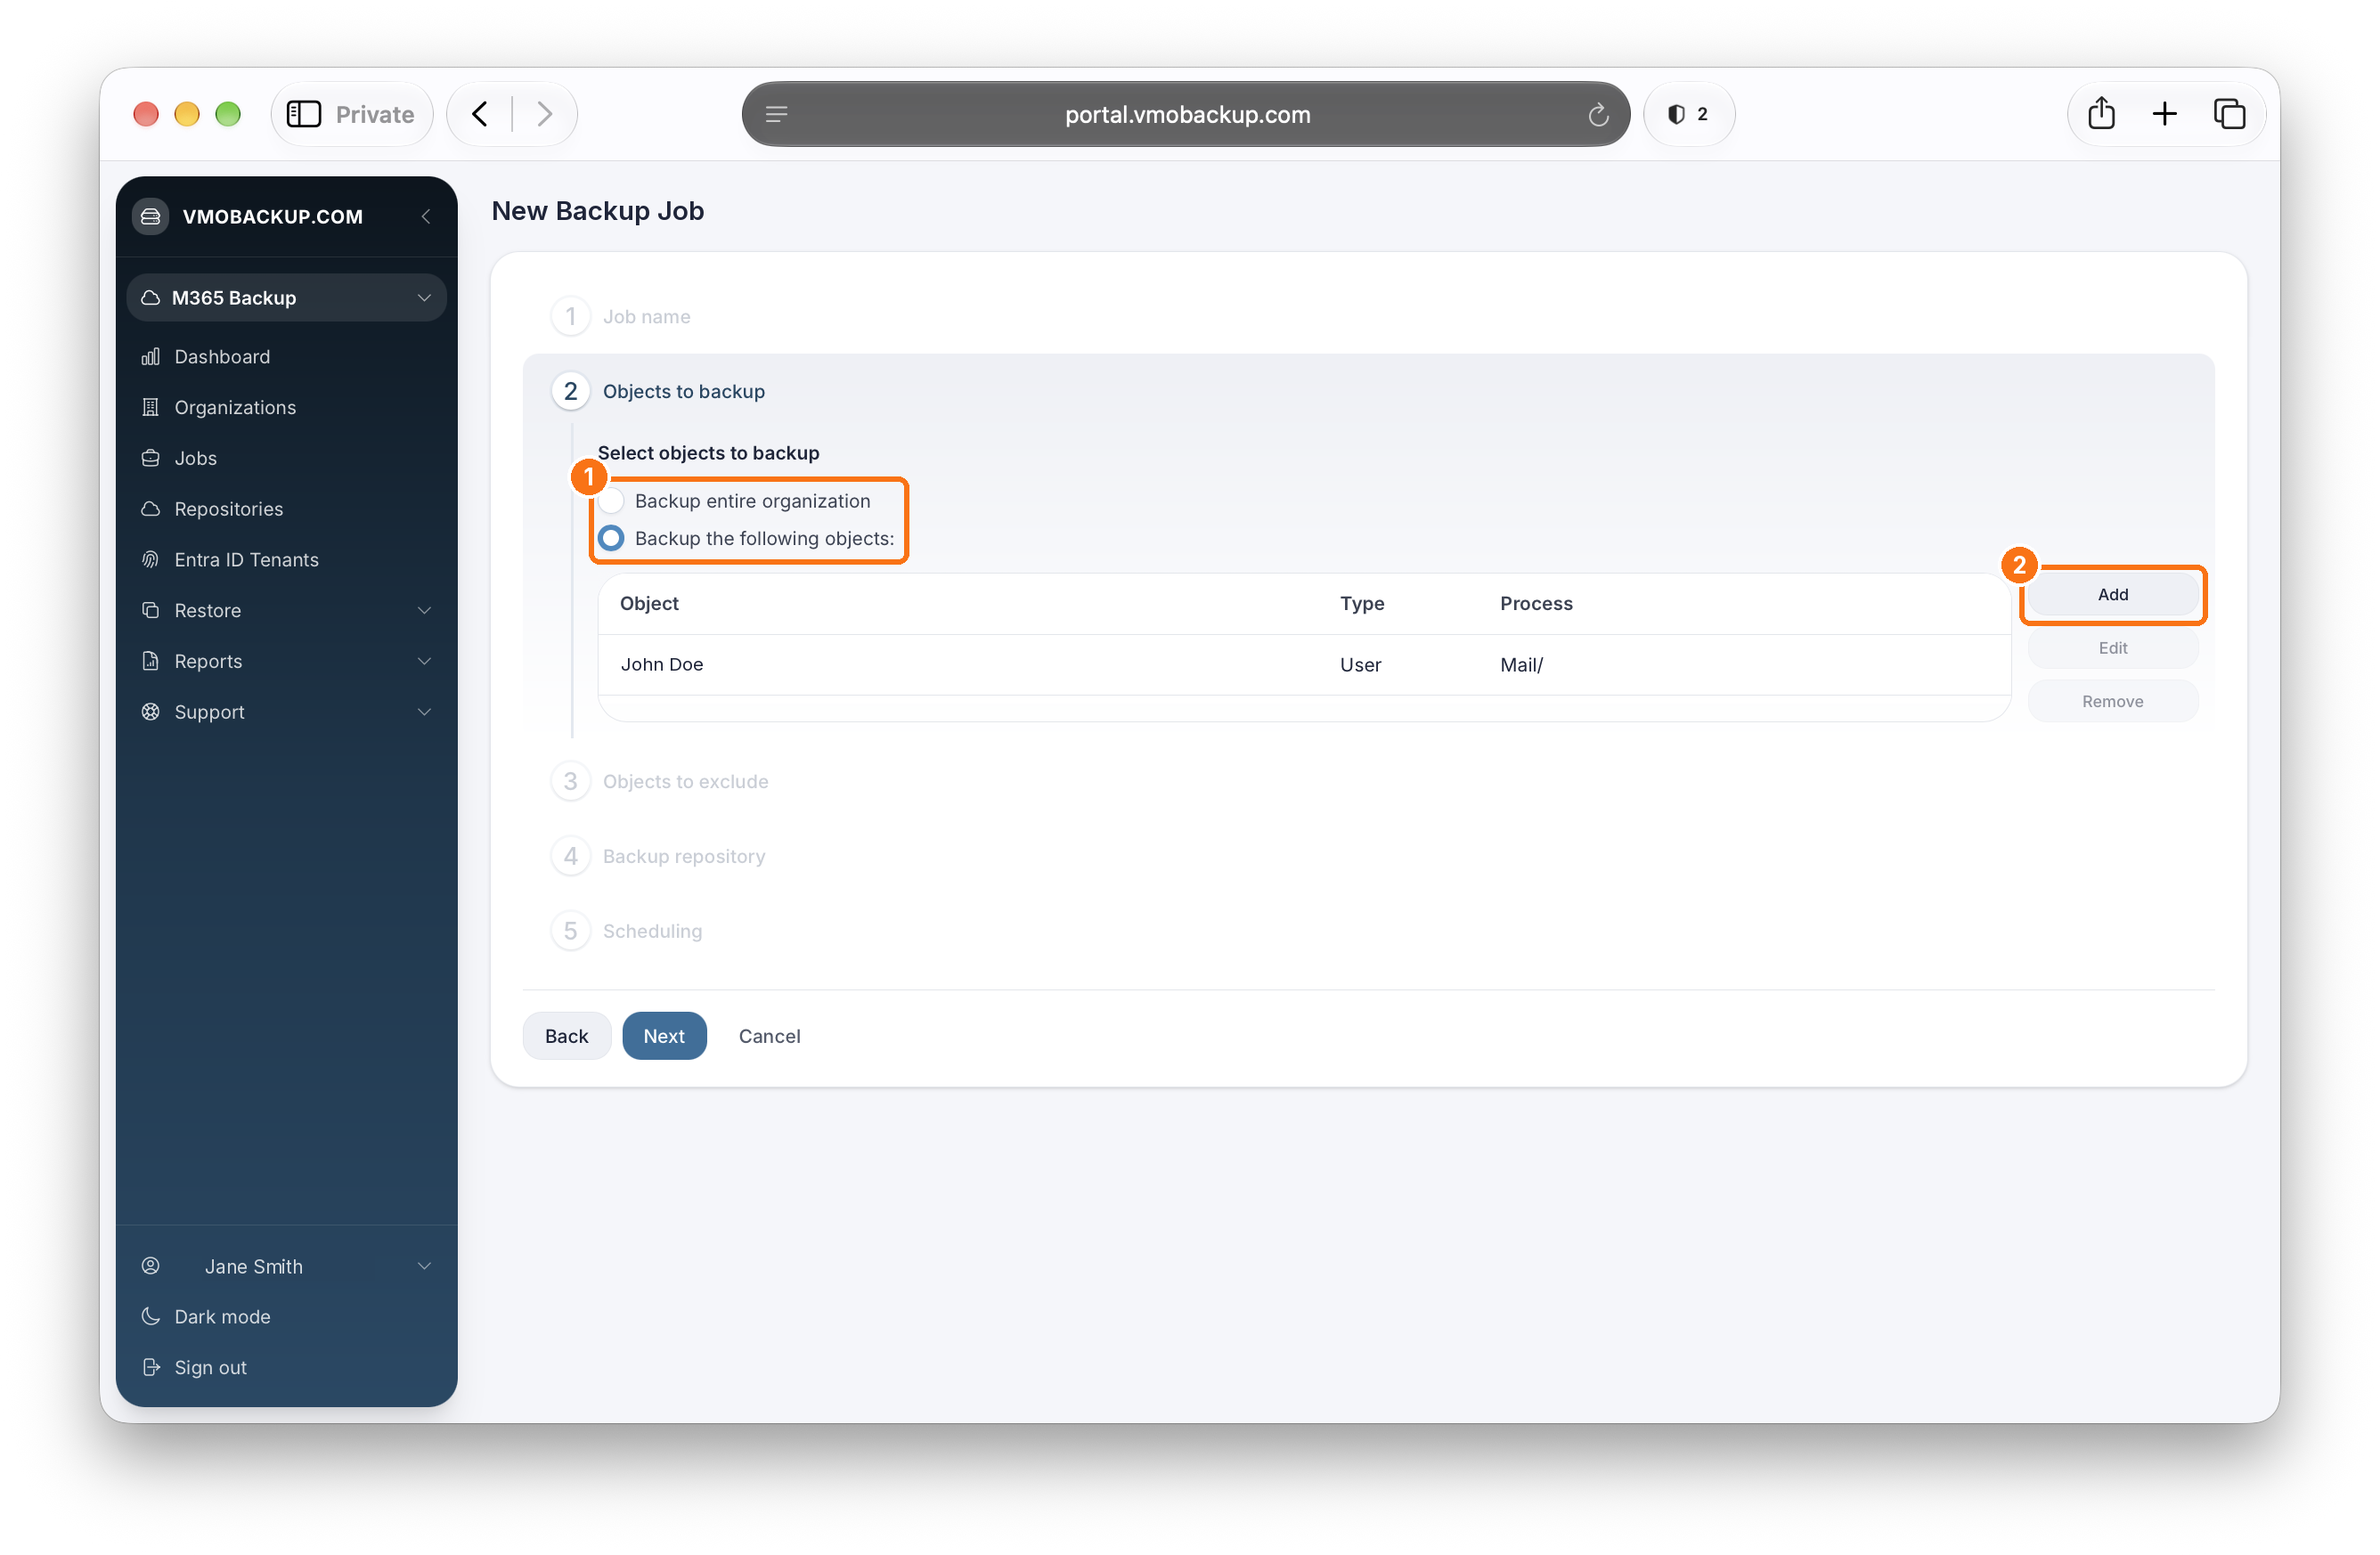
Select Backup the following objects, then click Add to choose only the users, groups, sites, or teams you now want to protect. Click Next.
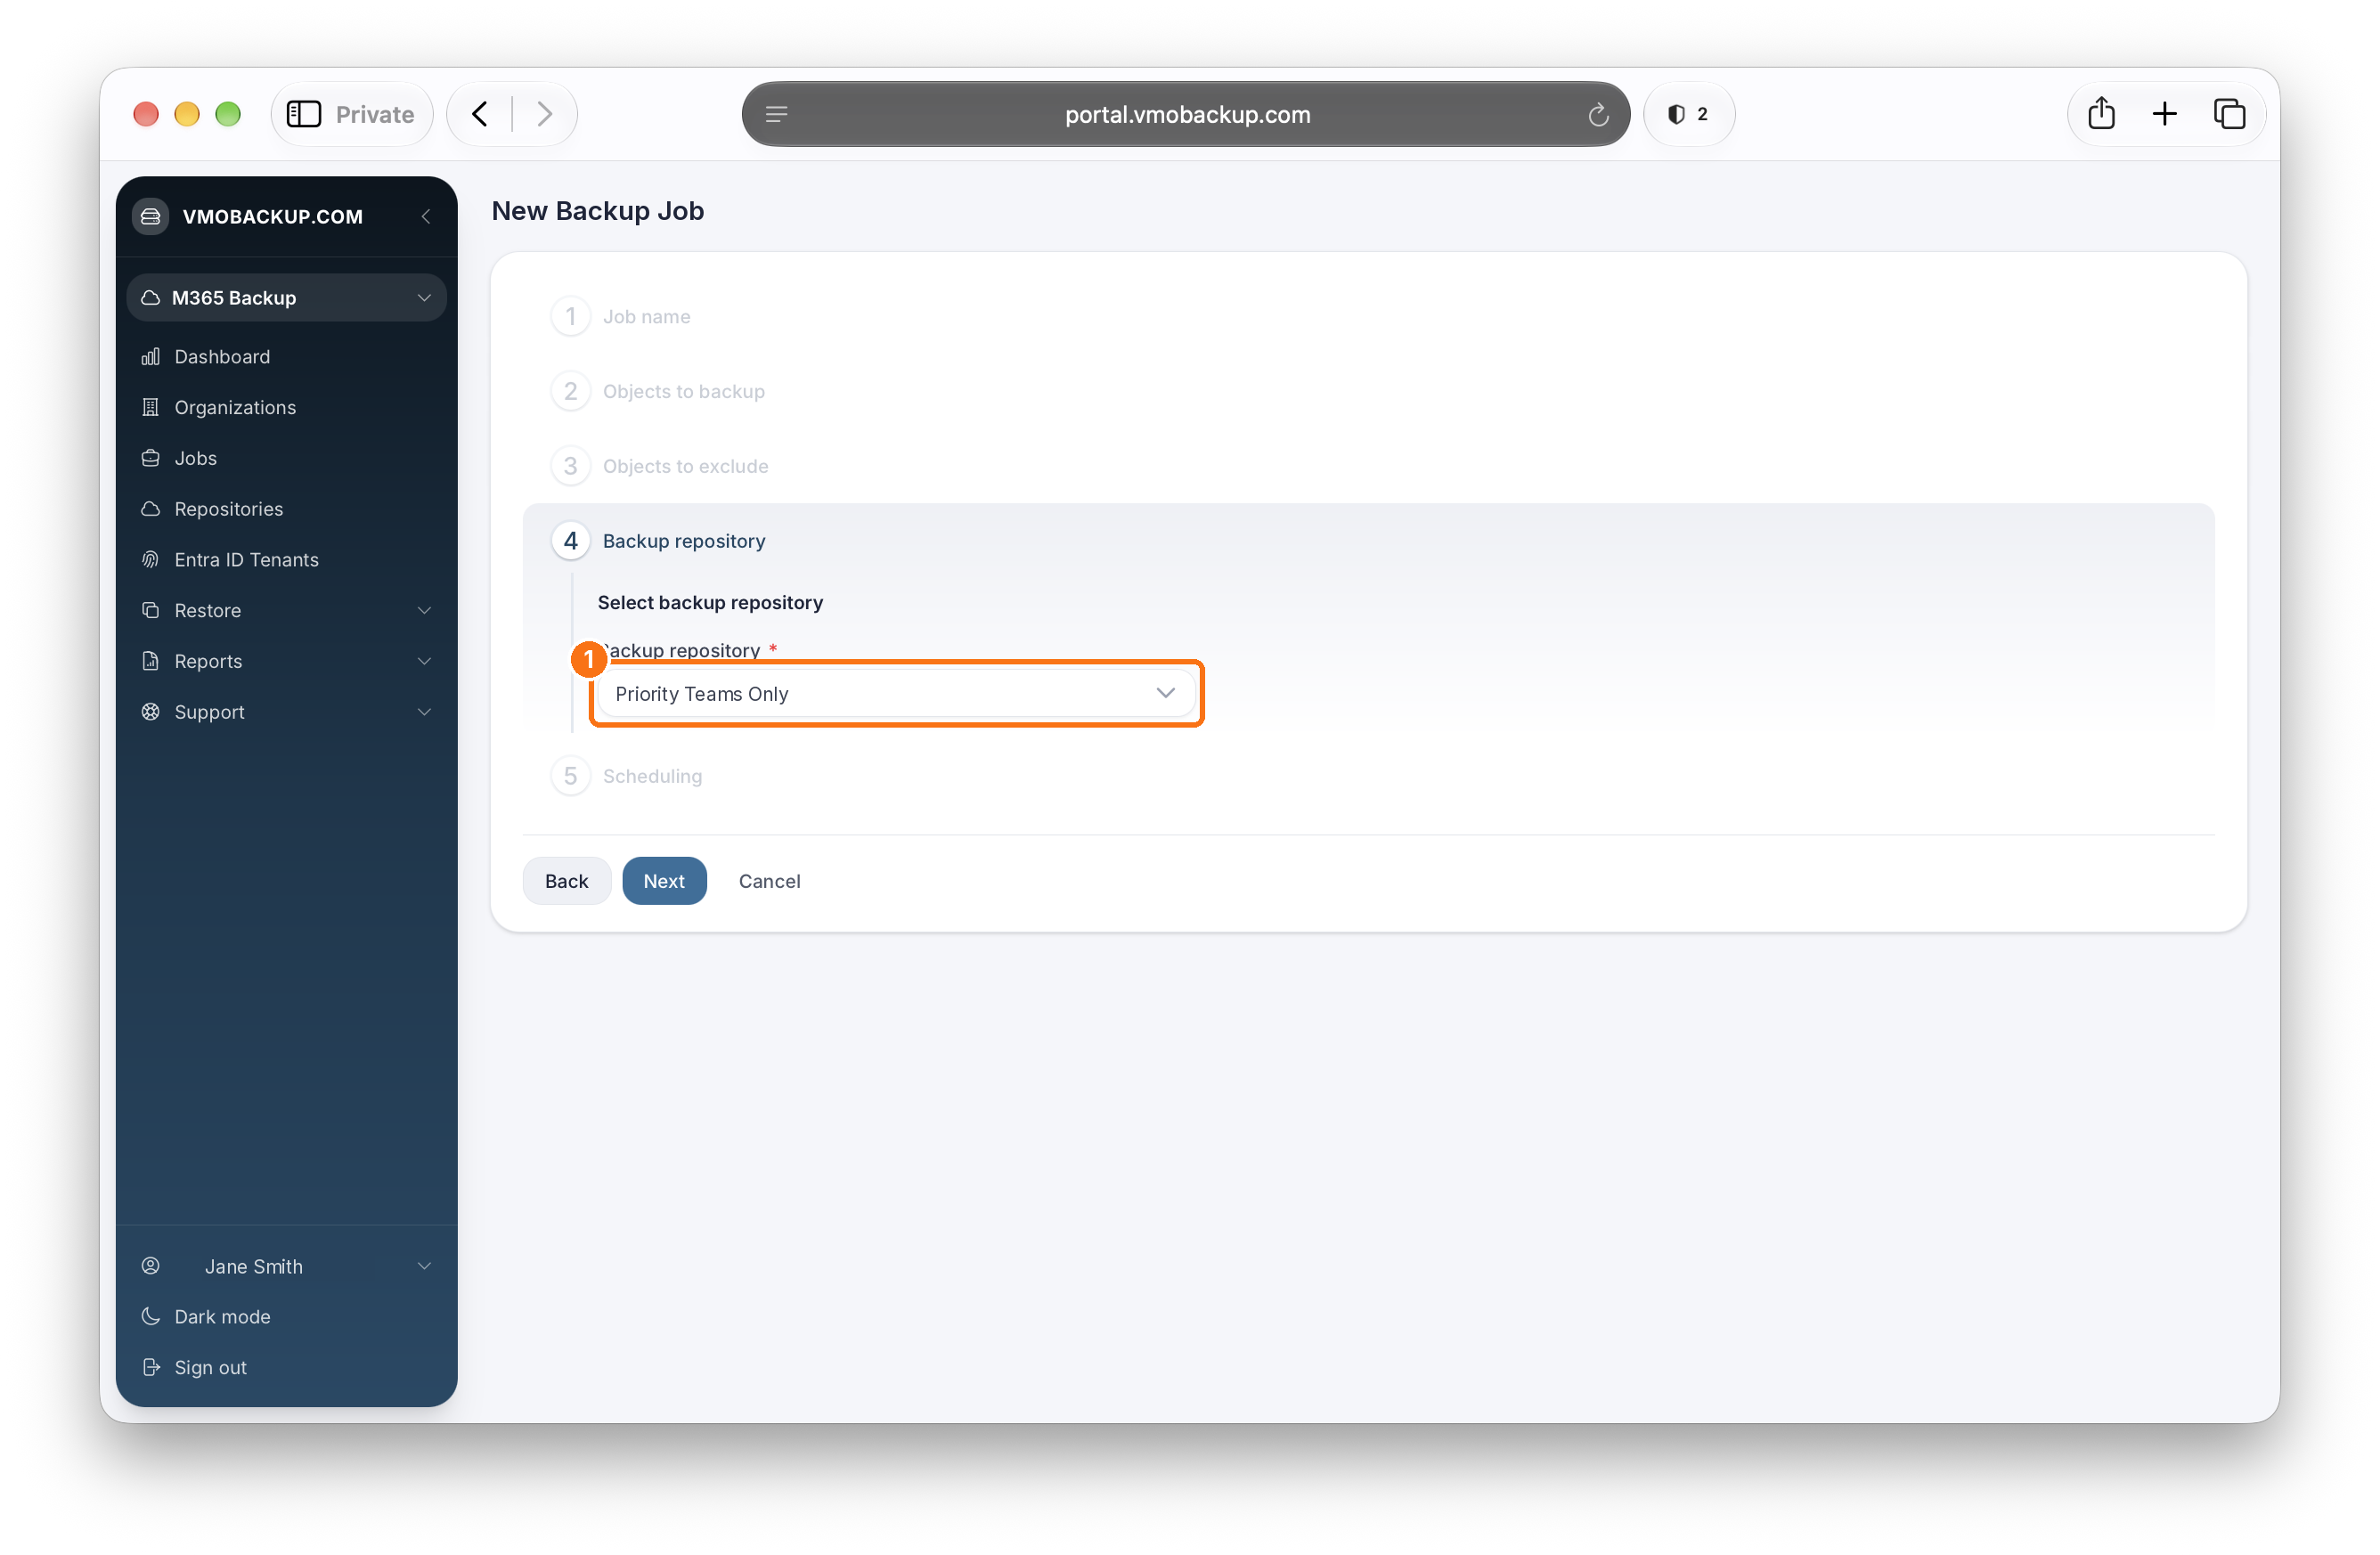
On the Backup repository step, select the new repository you created, then click Next.
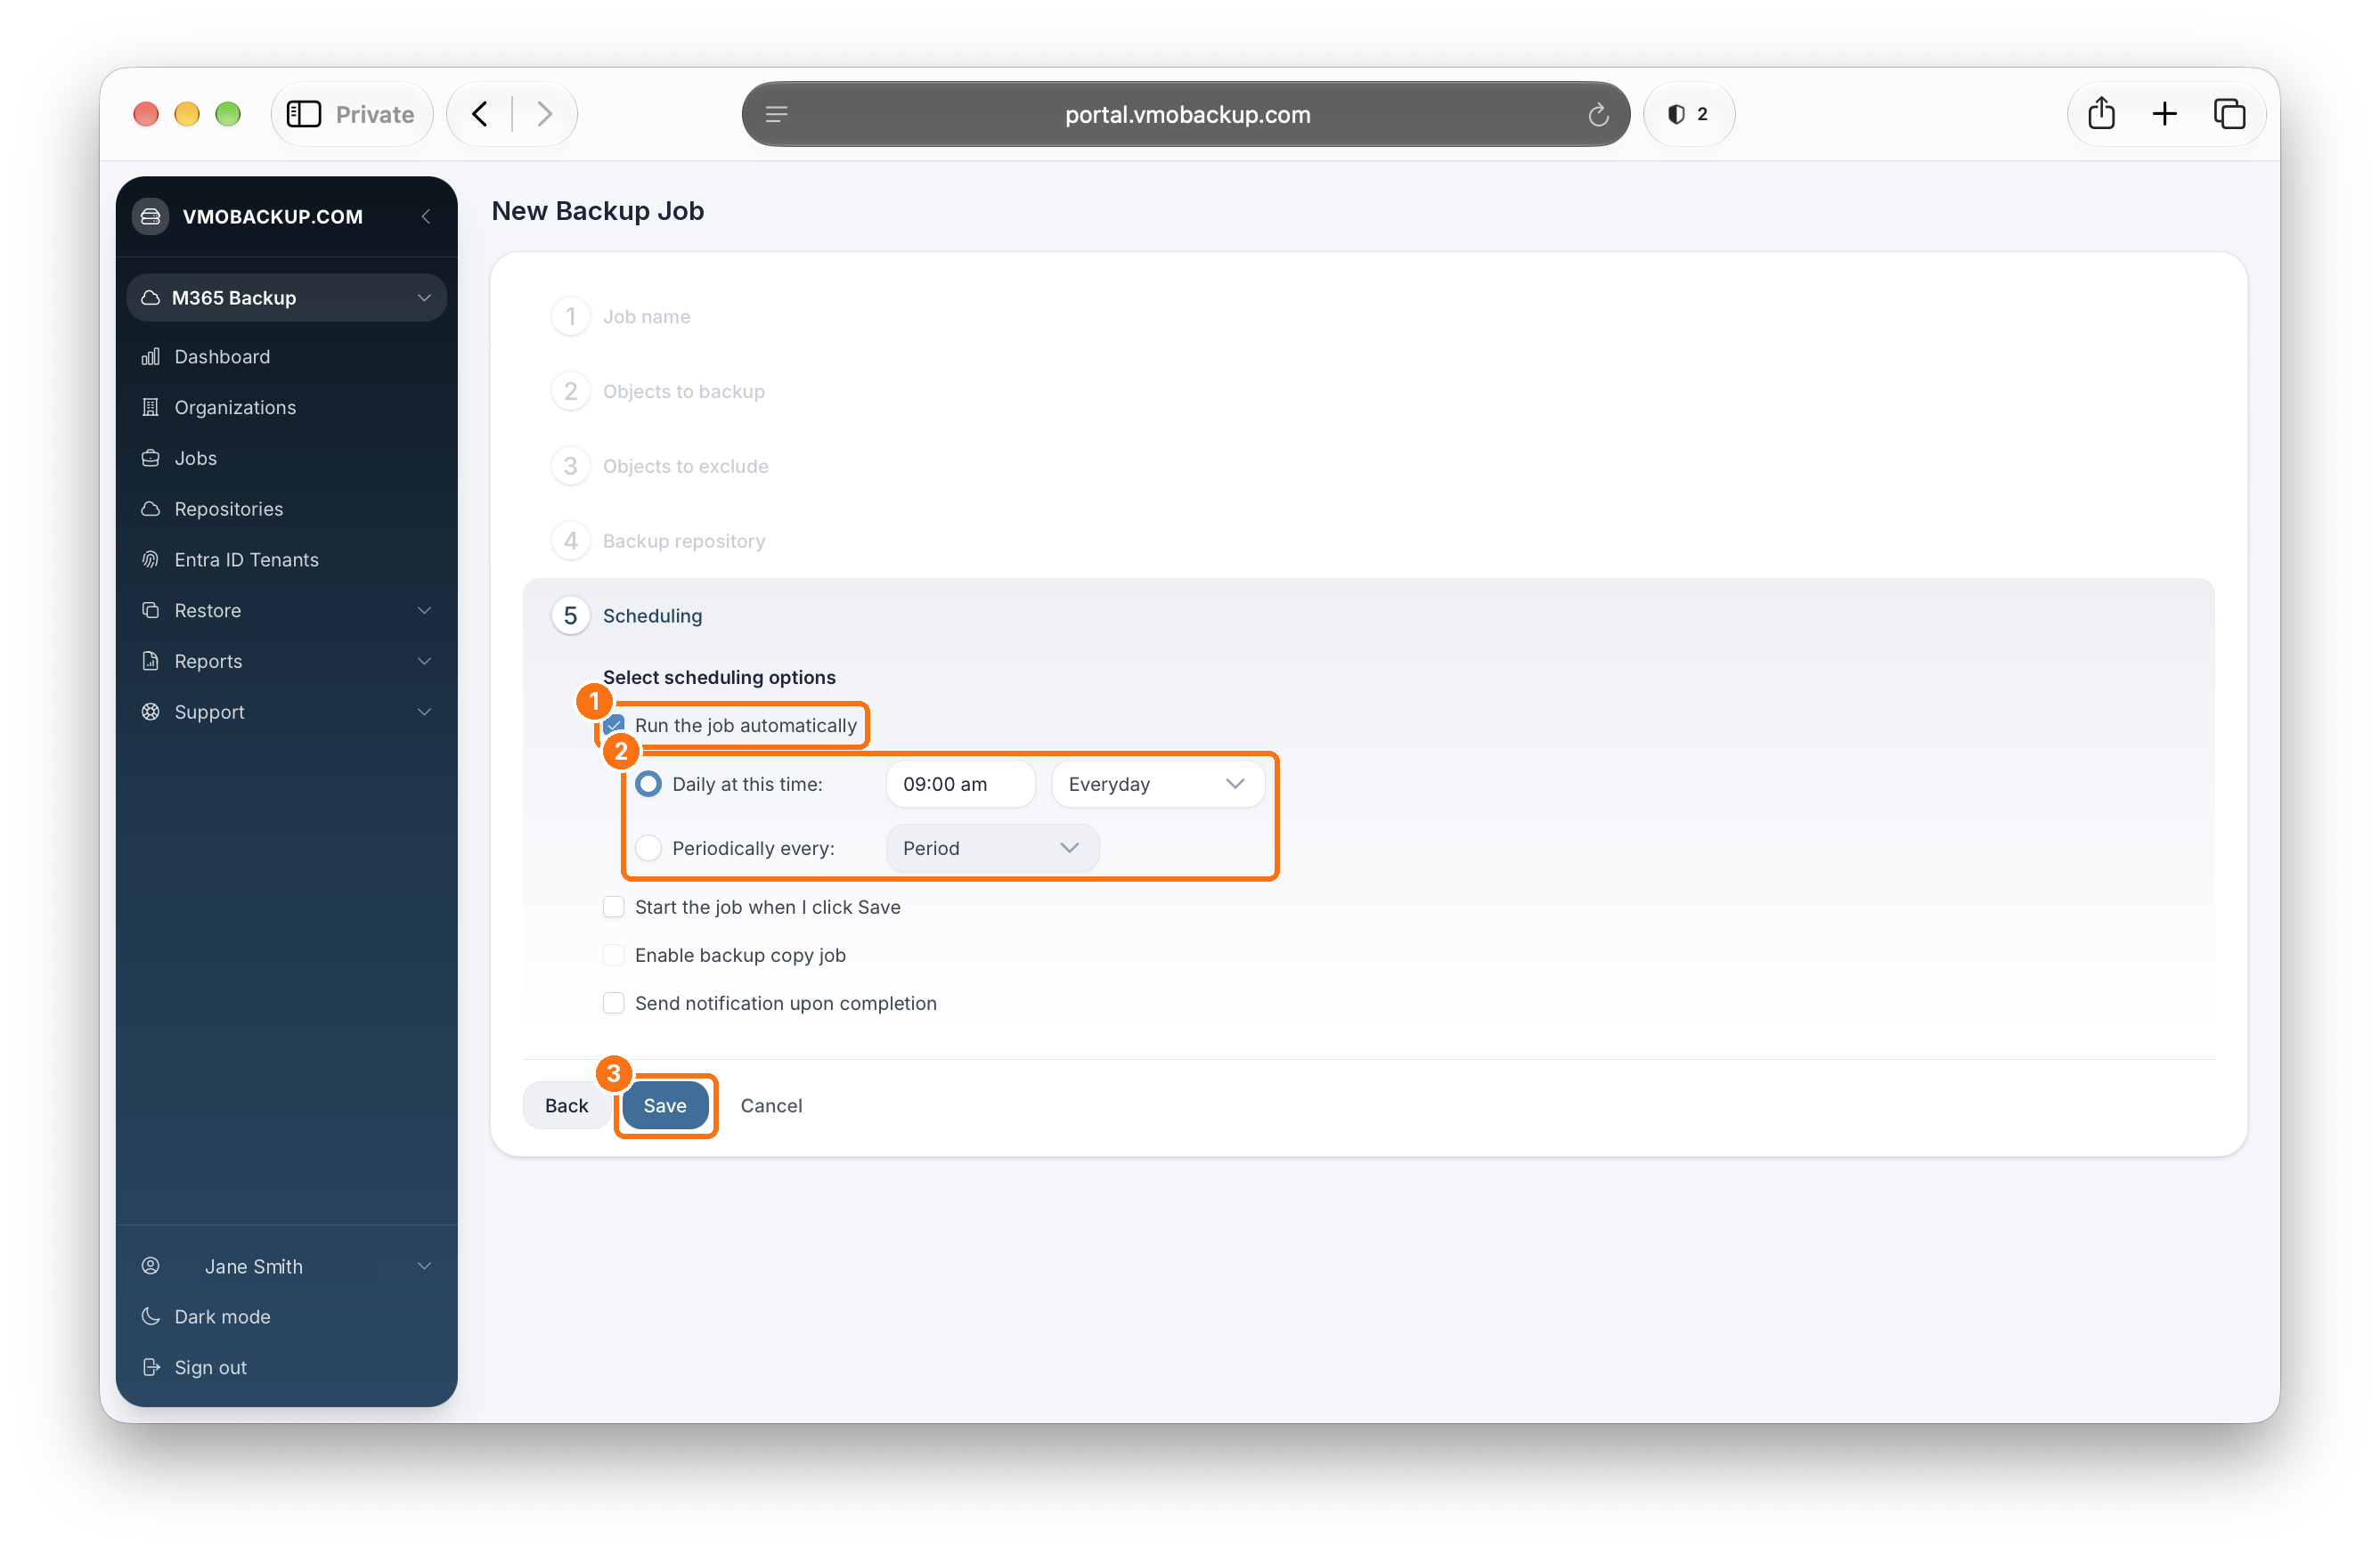
On the Scheduling step, make sure Run the job automatically is checked and choose when the job runs. Click Save to create and activate the job.
You’re All Set!
With your new repository and backup job in place, you’ll back up only the data you want to protect, and the storage used by your previous setup is cleared out.
If you need help reviewing your configuration or selecting specific data, schedule a quick call with our team. We’re happy to assist.